· 18 min read
7 Essential Mac Productivity Tips for 2025
Unlock your Mac's full potential with these 7 actionable Mac productivity tips. Learn advanced workflow hacks for Spotlight, Mission Control, and more.

In the quest for peak productivity, the tools we use daily often hold untapped potential. Your Mac is no exception. Beyond its sleek design lies a suite of powerful features and workflows that can reclaim hours from your week. This guide moves past the obvious advice to deliver a curated list of advanced, actionable Mac productivity tips. We are not just listing features; we are providing a strategic blueprint for transforming your daily digital habits.
You will learn to master system-native tools like Spotlight and Mission Control, leverage clever automation with the Shortcuts app, and optimize your workspace with intelligent utilities and organizational methods. Each tip is designed not just to be read, but to be implemented immediately, transforming how you interact with your machine. From professionals who need persistent notifications without a cluttered Dock to power users fine-tuning their interface, these insights offer tangible benefits.
Prepare to streamline your workflow, eliminate digital clutter, and unlock a new level of efficiency you didn’t know was possible. Let’s explore the powerful capabilities already at your fingertips, turning your Mac into a truly optimized productivity partner.
1. Master Spotlight Search: Your Mac’s All-Knowing Command Center
Many Mac users view Spotlight as a simple file searcher, but treating it this way is like using a supercomputer as a mere calculator. Spotlight is a powerful, system-wide command center that indexes nearly everything on your Mac, from files and applications to emails and calendar events. Mastering the Cmd+Space shortcut is the first step toward transforming your workflow. This single command brings up an interface that can launch apps, perform calculations, convert units, and find information, saving you countless clicks and folder-diving expeditions.
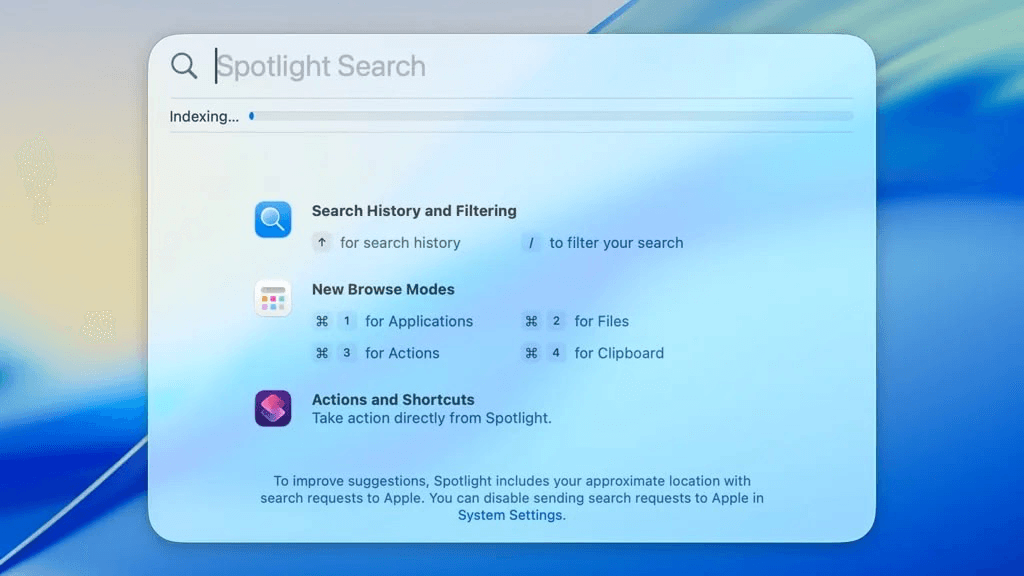
The real power of Spotlight lies in its intelligent, natural language queries and its ability to handle complex tasks directly. This tool is one of the most fundamental mac productivity tips because it centralizes control. Instead of opening your browser for a currency conversion or launching the Calculator app for a quick sum, you can do it all from one place. It significantly reduces context switching, keeping you focused on the task at hand.
How to Use Spotlight Effectively
To get the most out of Spotlight, think of it as your personal assistant. Be specific with your queries to get faster, more relevant results.
- Find Specific Files: Instead of just “report,” try typing “report kind:pdf date:last week” to find all PDF reports modified in the last 7 days. You can use keywords like
kind:,date:,author:, and boolean operators likeAND,OR, andNOT. - Launch and Switch Apps: Simply type the first few letters of an application’s name (e.g., “Pho” for Photos) and press Enter to launch it.
- Perform Quick Calculations and Conversions: Type mathematical expressions like “(145*3)/2” or conversions like “150 USD in EUR” or “98 F in C” for instant answers.
- Access System Preferences: Need to change your display settings? Type “display” and Spotlight will take you directly to the correct System Settings pane.
- Search Your History and Bookmarks: Quickly find a website by typing part of its name or URL. Spotlight searches through your Safari history and bookmarks for a match.
- Check Definitions: Type “define: productivity” to get an immediate dictionary definition without opening a browser or the Dictionary app.
2. Utilize Mission Control and Spaces for a Clutter-Free Workflow
A cluttered digital desktop is just as distracting as a cluttered physical one. This is where Mission Control and Spaces come into play, serving as macOS’s powerful system for organizing your applications and windows. Mission Control provides a bird’s-eye view of everything running on your Mac, while Spaces allows you to create multiple virtual desktops. By combining them, you can dedicate entire desktops to specific tasks or projects, dramatically reducing visual noise and making it easier to focus.
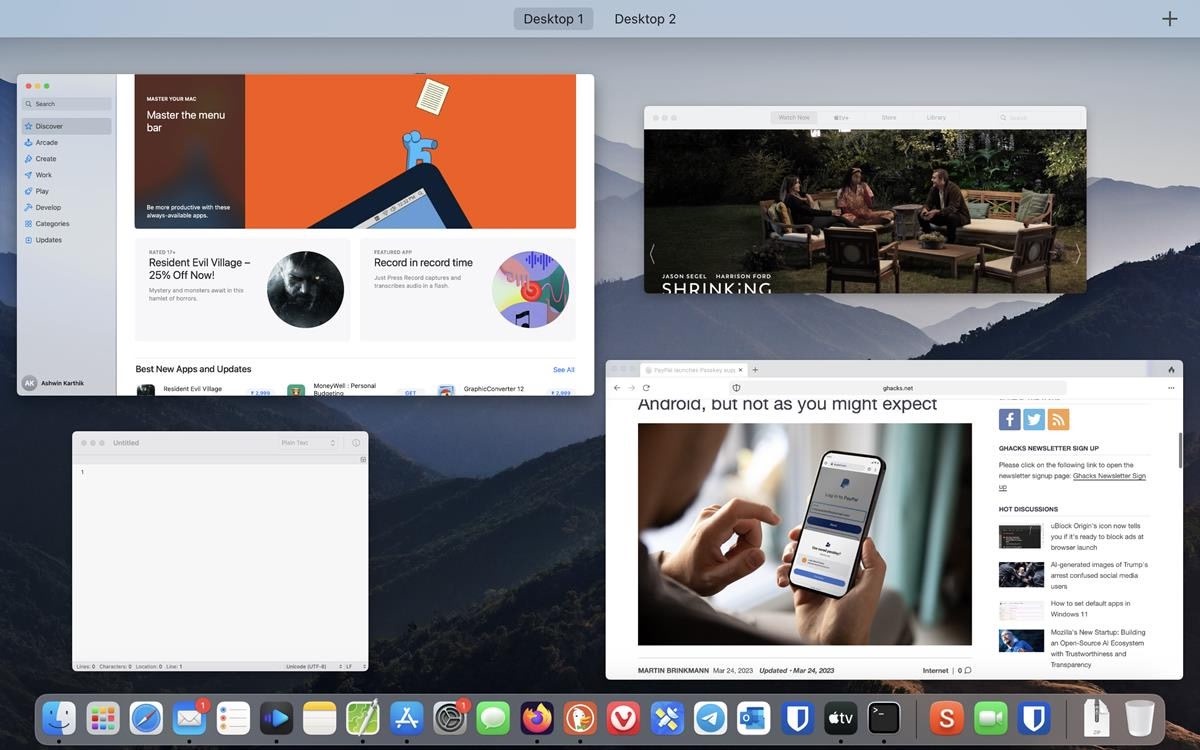
The core benefit of this system is mental compartmentalization. Instead of having your email, web browser, code editor, and design software all competing for attention on one screen, you can assign them to separate, dedicated Spaces. This approach is one of the most effective mac productivity tips for anyone juggling multiple roles or projects. It minimizes distractions and allows you to fully immerse yourself in a single context before smoothly transitioning to the next, maintaining a state of flow.
How to Use Mission Control and Spaces Effectively
To turn this feature into a productivity powerhouse, you need to be intentional about how you set up and navigate your virtual desktops. The goal is to create a predictable, organized environment.
- Create and Organize Your Spaces: Activate Mission Control (press F3, or swipe up with three/four fingers on your trackpad). In the Spaces bar at the top of the screen, click the + button to add a new desktop. You can drag and drop application windows onto different Spaces to organize them.
- Assign Apps to Specific Spaces: For consistency, you can assign an application to always open in a specific Space. Right-click the app’s icon in the Dock, go to Options, and select Assign To > This Desktop. For example, always have Slack and Mail open in “Desktop 1” for communications.
- Master Keyboard Shortcuts: The fastest way to navigate is with shortcuts. Use Ctrl + Right Arrow and Ctrl + Left Arrow to instantly switch between adjacent Spaces. This is far quicker than using the trackpad or mouse.
- Leverage Hot Corners: In System Settings, go to Desktop & Dock, then scroll down to Hot Corners. You can assign a corner of your screen to activate Mission Control, so a quick flick of the mouse gives you an overview of all your Spaces and windows.
- Arrange Spaces Manually: By default, macOS rearranges Spaces based on recent use. For a more stable setup, go to System Settings > Desktop & Dock, find the Mission Control section, and uncheck “Automatically rearrange Spaces based on most recent use.” This keeps your desktops in a fixed, predictable order.
3. Leverage Keyboard Shortcuts and Text Expansion
Relying on a mouse or trackpad for every action is a surefire way to slow down your workflow. The most efficient Mac users minimize physical hand movements by mastering keyboard shortcuts and text expansion. Combining these two techniques allows you to navigate the OS, manage applications, and insert frequently used text with just a few keystrokes. Committing to this keyboard-centric approach is a cornerstone of any effective collection of mac productivity tips, as it shaves seconds off countless repetitive actions, which accumulate into hours of saved time.
The core principle is simple: your hands stay on the keyboard, reducing the context switching that occurs when you reach for the mouse. macOS has a vast library of built-in shortcuts, while its native text replacement feature acts as a basic text expander. Instead of manually typing out your full address or a common email response, you can assign a short abbreviation that instantly expands into the full text. This synergy between navigation shortcuts and text expansion creates a highly efficient and personalized work environment.
How to Use Keyboard Shortcuts and Text Expansion
To effectively integrate these methods, start small and build muscle memory. Don’t try to learn everything at once; focus on the commands and phrases you use most often.
- Master Essential System Shortcuts: Begin with universal commands. Cmd+Tab to switch between open apps, Cmd+` to cycle through windows of the current app, and Cmd+Shift+4 to capture a specific area of your screen.
- Create Custom Text Replacements: Go to System Settings > Keyboard > Text Replacements. Click the ”+” icon to add your own. For example, create a shortcut like “;addr” that expands to your full mailing address or “;sig” for your email signature.
- Establish a Naming Convention: Use a consistent prefix for your text expansions, like a semicolon (
;) or “xx”, to avoid accidentally triggering them. For example, use;email1for your personal email and;email2for your work email. - Explore App-Specific Shortcuts: Every application has its own set of shortcuts. Spend a few minutes in the menu bar of your most-used apps (like Safari, Pages, or Slack) to identify actions you perform frequently and learn their corresponding keyboard commands.
- Utilize Advanced Tools: For more power, consider third-party apps. Tools like Alfred or TextExpander offer more advanced features, such as dynamic placeholders, multi-line snippets, and script execution, taking this concept to a professional level.
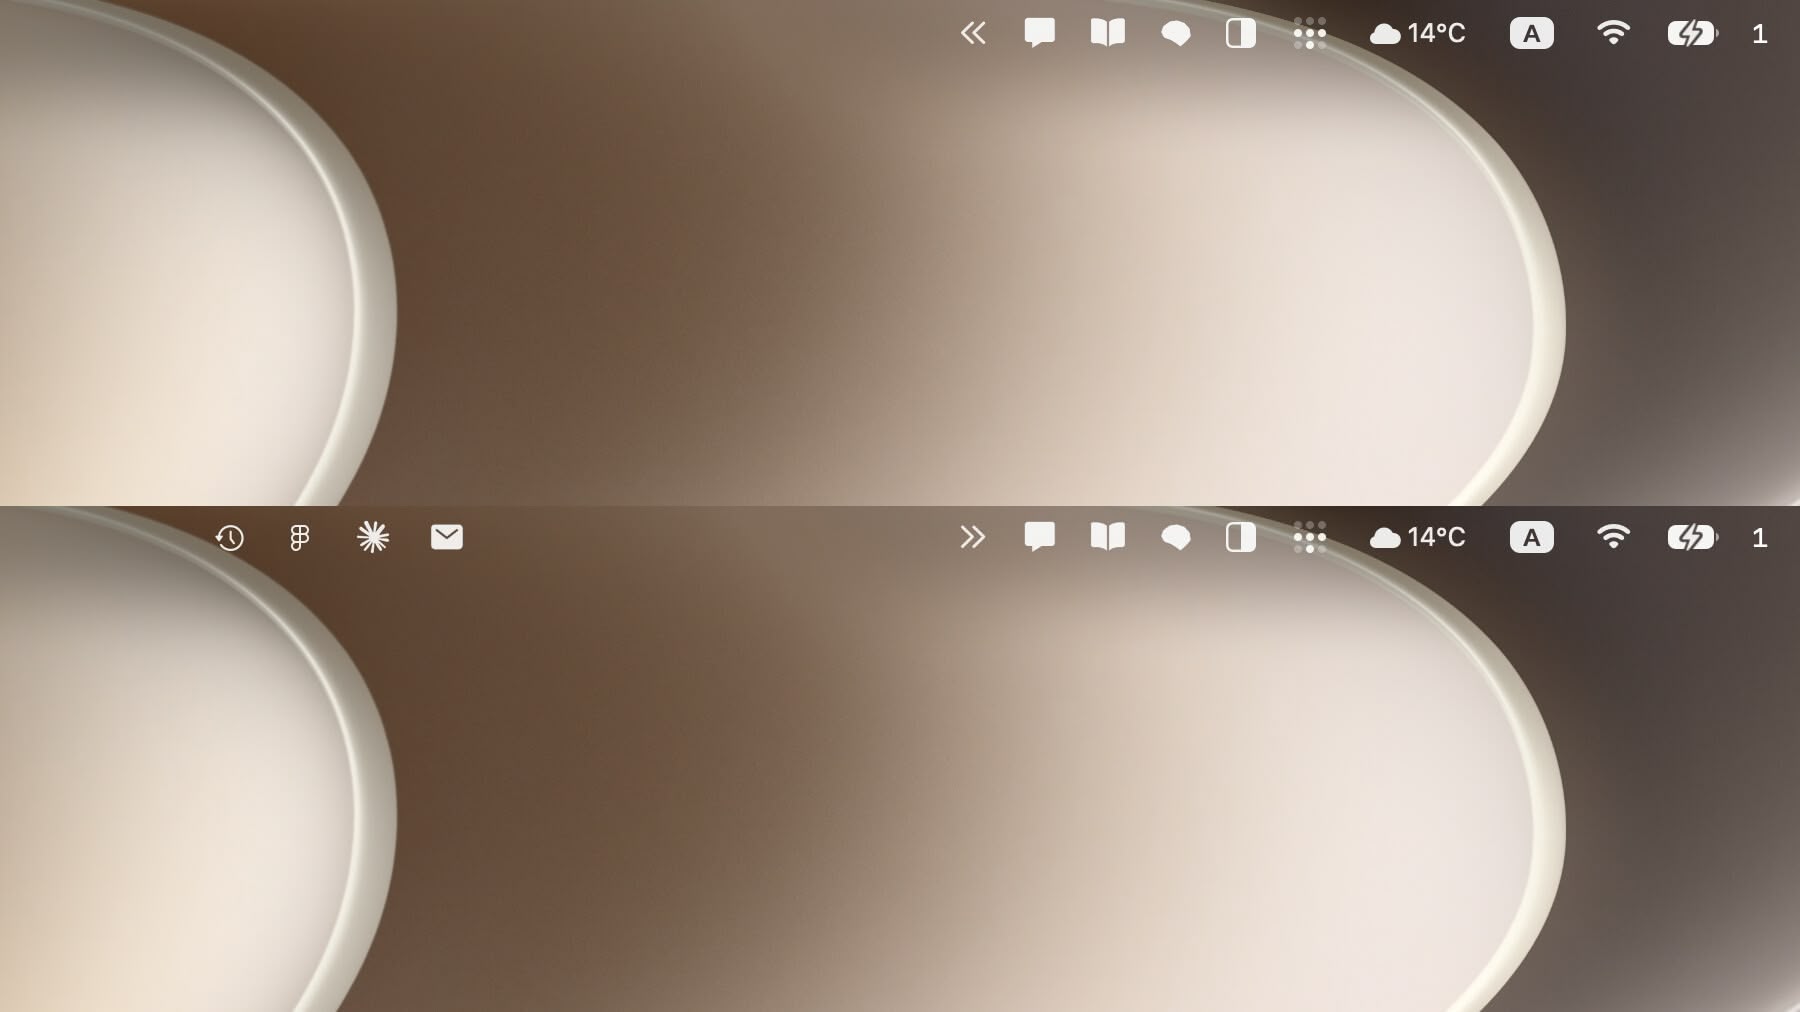
4. Optimize Dock and Menu Bar Management
The Dock and Menu Bar are the twin pillars of macOS navigation, yet they often become cluttered digital junkyards. Treating these core interface elements as static fixtures is a missed opportunity. Strategic management of your Dock and Menu Bar transforms them from passive app launchers into dynamic, context-aware productivity hubs. By curating what you see and hiding what you don’t, you reclaim valuable screen real estate and, more importantly, mental focus.
This level of interface curation is one of the most impactful mac productivity tips because it directly combats visual noise and decision fatigue. Every unnecessary icon is a small distraction, a minor cognitive load that accumulates throughout the day. A clean Dock and a well-managed Menu Bar mean you can find what you need instantly without scanning through a sea of icons. This reduces friction, minimizes context switching, and keeps your digital workspace as organized as your physical one.
How to Manage Your Dock and Menu Bar Effectively
To get the most out of these elements, adopt a minimalist and intentional approach. Your goal is to make every icon earn its place.
- Curate Your Dock: Drag out any applications you don’t use daily. Use Spotlight (Cmd+Space) or Launchpad to open everything else. A minimalist Dock with only your 5-7 most essential apps is far more efficient.
- Organize with Stacks: Instead of letting your Downloads folder consume your Dock, drag it to the right side to create a “Stack.” This provides quick access to recent files without the clutter. You can also create Stacks for project folders or frequently accessed documents.
- Use Menu Bar Managers: Tools like Bartender or the free Hidden Bar are game-changers. They allow you to hide lesser-used menu bar icons behind a single click, keeping your primary menu clean and focused on critical system information and apps.
- Reposition the Dock: If you work on a widescreen monitor, moving the Dock to the left or right side of the screen can provide more vertical space for your application windows. Experiment with what feels most natural for your workflow.
- Enhance with Customization: Elevate your menu bar’s utility by adding visual cues. You can learn more about how to customize your Mac menu bar icons to make important apps stand out and convey information at a glance.
- Remove Recent Apps: By default, the Dock shows recently used applications. Turn this off in System Settings > Desktop & Dock by disabling “Show recent applications in Dock” to maintain a static, predictable layout.
5. Implement Automated Workflows with Shortcuts and Automator
Repetitive tasks are the silent killers of productivity, slowly draining your time and mental energy. macOS offers two powerful, built-in solutions to combat this: Shortcuts and Automator. These tools allow you to build custom automated workflows that can handle everything from simple file conversions to complex, multi-step processes involving several apps. By investing a small amount of time to set up these automations, you reclaim countless hours and eliminate the potential for human error in your daily work.
The ability to chain together actions without writing a single line of code is what makes this one of the most potent mac productivity tips for power users. Instead of manually resizing and watermarking every photo for your blog, you can create a workflow that does it in a single click. These tools integrate deeply with the macOS ecosystem, allowing you to orchestrate actions across Finder, Calendar, Mail, and third-party apps, turning your Mac into a truly personal and efficient machine.
How to Use Automation Effectively
To get started, identify a repetitive task you perform frequently. The Shortcuts app is more modern and user-friendly, making it a great starting point, while Automator remains excellent for creating folder actions and services.
- Batch Rename Files: Stop renaming files one by one. Use Automator to create a workflow that renames a batch of files with a specific pattern, like adding a date prefix or replacing text.
- Automate Image Processing: Create a Shortcut or Quick Action to automatically resize images to a specific width, convert them to JPG, and move them to a designated “for web” folder.
- Create Project Folders: Build a workflow that instantly creates a standard set of project folders (e.g., “Assets,” “Drafts,” “Finals,” “Resources”) with a single command, ensuring consistency.
- Use Folder Actions: Attach an Automator script to a folder. For example, any PDF dropped into a “Compress” folder can be automatically run through a compression action.
- Schedule Tasks with Calendar: Combine your workflows with Calendar events to run them on a schedule. You could set up a weekly script that archives old files from your Downloads folder.
- Start Simple and Build: Begin with a simple, two-step workflow, like converting a document format. As you grow more comfortable, you can add more complexity and conditions to handle more sophisticated tasks.
6. Master Window Management and Split View
Juggling multiple windows can feel like a digital circus act, but mastering window management transforms a cluttered screen into an organized, high-efficiency workspace. While macOS has come a long way, its default window handling can leave power users wanting more. By combining built-in features like Split View with powerful third-party tools, you can eliminate the constant resizing and repositioning that chips away at your focus and momentum. This is one of the most impactful mac productivity tips for anyone who works with more than one application at a time.
The core principle of effective window management is to create a predictable, organized layout for your applications, allowing you to multitask without the chaos. Whether you’re a writer researching in Safari while taking notes in Notes, or a developer with a code editor on one side and documentation on the other, a structured screen layout significantly reduces cognitive load. You spend less time finding and arranging windows and more time getting work done.
How to Use Window Management Effectively
To get started, combine native macOS features with popular third-party apps for the best of both worlds. A small time investment here pays huge dividends in daily productivity.
- Activate Split View: Hover your cursor over the green full-screen button in the top-left corner of a window. You’ll see options to “Tile Window to Left of Screen” or “Tile Window to Right of Screen.” Select one, and then choose another open window for the other side.
- Use Keyboard Shortcuts (with help): While macOS lacks robust window-snapping shortcuts, free tools like Rectangle or paid alternatives like Magnet fill this gap perfectly. They allow you to use keyboard shortcuts (e.g., Ctrl+Opt+Left Arrow) to snap windows to halves, thirds, or corners of your screen.
- Create Tailored Layouts: For specific tasks, create dedicated layouts. When managing meetings, keep your calendar on one side of the screen and Slack or your email client on the other. This setup prevents you from missing notifications while scheduling.
- Optimize for Your Screen: The larger your monitor, the more complex your layouts can be. On a large external display, you can comfortably use a three-column layout. On a smaller MacBook screen, a simple 50/50 split is often most effective.
- Practice App Switching: Even with perfect window placement, you’ll still need to switch apps. Use Cmd+Tab to cycle through open applications quickly, keeping your hands on the keyboard and maintaining your flow state.
7. Optimize File Organization with Tags and Smart Folders
While traditional nested folders are familiar, they create a rigid, one-dimensional organizational structure. macOS offers a far more flexible system with Tags and Smart Folders, allowing you to categorize and find files based on context, priority, and status, not just their location. This method lets a single file exist in multiple “virtual” locations without duplication, making it a cornerstone mac productivity tip for anyone juggling complex projects. By assigning color-coded or text-based tags, you create a dynamic, searchable metadata layer across your entire file system.
The real breakthrough happens when you pair tags with Smart Folders. A Smart Folder isn’t a real folder; it’s a saved search that continuously and automatically gathers all files that meet specific criteria you define. For example, it can display all files tagged “Urgent” from the last week, regardless of whether they are PDFs in your Documents folder or images on your Desktop. This automates organization, saving you from manually sorting files and ensuring important items never get lost in a sea of nested directories.
How to Use Tags and Smart Folders Effectively
To get started, develop a consistent tagging system that aligns with your workflow. Consistency is key to making this system reliable and intuitive over the long term.
- Create a Consistent Tagging System: Define a core set of 7-10 tags to avoid overwhelming yourself. Use a mix of project names (e.g., “Project-Alpha”), status indicators (“InProgress,” “AwaitingReview,” “Complete”), and priority levels (“Urgent,” “HighPriority”). You can assign colors to your most-used tags for quick visual identification.
- Tag Files on Creation: Make it a habit to tag files the moment you save them. You can do this directly in the Save dialog box (Cmd+Shift+S) by clicking the “Tags” field. This small step upfront saves significant organizational time later.
- Create Dynamic Smart Folders: In Finder, go to File > New Smart Folder. Use the plus (+) button to add criteria. For example, create a Smart Folder for “Recent Client Work” by setting criteria like
Tag is 'Client-X'ANDLast modified date is within the last 30 days. - Combine Tags for Granular Searches: Use multiple tags to zero in on specific items. Finding an invoice becomes simple when you can search for files tagged with both “Invoice” and “Client-Y”.
- Organize by Priority: Use colored tags for a simple, universal priority system. A common setup is Red for “Urgent,” Yellow for “In Progress,” and Green for “Completed.” These colors are visible at a glance in any Finder window.
- Conduct Regular Tag Maintenance: Once a quarter, review your tags in Finder’s sidebar. Merge duplicates, delete unused ones, and ensure your system still aligns with your current projects and workflow.
From Tips to Habits: Integrating Productivity into Your Daily Mac Workflow
Embarking on a journey to enhance your digital efficiency is not about a single, monumental change. Instead, true mastery comes from the cumulative effect of small, intentional adjustments. The collection of mac productivity tips we’ve explored in this guide provides a powerful toolkit, but these tools are only effective when put into practice. The real transformation happens when a clever trick evolves into an unconscious, everyday habit.
We’ve covered a wide spectrum of strategies, each designed to tackle a specific friction point in your workflow. From the lightning-fast navigation enabled by mastering Spotlight Search to the organized, multi-project focus afforded by Mission Control and Spaces, the core principle is the same: reduce cognitive load and minimize wasted clicks. By embracing keyboard shortcuts and text expansion, you reclaim seconds that add up to significant time savings over a week, a month, and a year.
Turning Knowledge into Action
The key takeaway is not to implement every single tip at once. That approach is a recipe for overwhelm and ultimately, failure. The path to a truly productive Mac environment is incremental. Your mission now is to identify the most significant bottlenecks in your current process and select one or two solutions from this article to address them directly.
Consider these actionable next steps:
- Audit Your Workflow: For the next two days, pay close attention to what frustrates you. Is it constantly searching for the same files? Do you spend too much time arranging windows? Are repetitive typing tasks slowing you down? Pinpoint the pain.
- Select Your First “Habit-in-Training”: Based on your audit, choose a single, high-impact tip. If file retrieval is your issue, commit to using Tags and Smart Folders for one specific project. If window chaos is the problem, make a conscious effort to use Split View or a window manager for every work session this week.
- Practice with Intention: For one week, focus solely on integrating that chosen technique. It will feel slow and deliberate at first, but this focused practice is what builds the muscle memory required for it to become automatic. Once it feels natural, you can move on to the next tip.
The Broader Impact of a Streamlined System
Mastering these mac productivity tips does more than just make you faster. It fundamentally changes your relationship with your machine. Your Mac ceases to be a passive tool you simply use and becomes an active partner, customized to anticipate your needs and amplify your efforts. This personalized system reduces friction, conserves mental energy for deep work, and fosters a state of flow where you can focus on what truly matters: creativity, problem-solving, and achieving your most ambitious goals. By taking control of your digital environment, you create the space necessary for your best work to emerge.
For those of you who thrive on a clean, minimalist desktop but still need to stay on top of critical updates, optimizing your notifications is a crucial step. If you hide your Dock to maximize screen real estate but miss having persistent notification badges, a specialized tool can bridge that gap perfectly. Check out Badgeify to bring customizable, always-visible notification badges directly to your menu bar, ensuring you never miss an important message while keeping your workspace clutter-free.
Ready to Transform Your Mac Menu Bar?
Perfect companion for Bartender & Ice users. Ideal for productivity enthusiasts who prefer a cleaner desktop.