· 4 min read
How to Add/Remove Icons from the Menu Bar on macOS Tahoe
Customize your Mac menu bar in macOS Tahoe: built-in add/remove methods, notch-friendly tips, and when to use third-party tools.
The menu bar in macOS Tahoe is more customizable than ever, allowing you to create a clean, organized workspace that matches your workflow. Whether you want to declutter by removing unnecessary icons or add custom shortcuts for your favorite apps, this guide covers everything you need to know.
How to Remove Icons from the Menu Bar
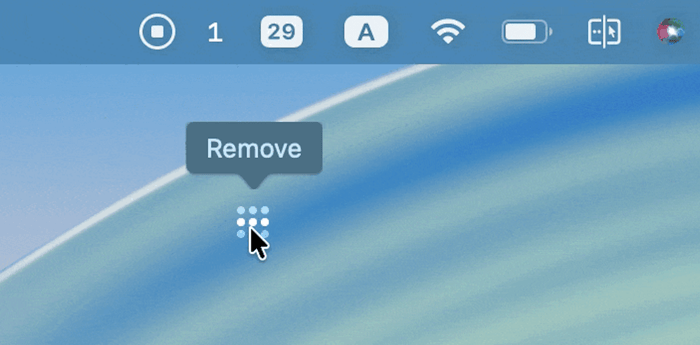
Method 1: Command + Drag (Quick Removal)
The fastest way to remove most menu bar icons is using the command-drag method:
- Hold the Command (⌘) key on your keyboard
- Click and hold the icon you want to remove
- Drag it off the menu bar - you’ll see a “remove” indicator appear
- Release the mouse and the icon disappears
This works for most system icons and many third-party app icons.
Method 2: System Settings Control
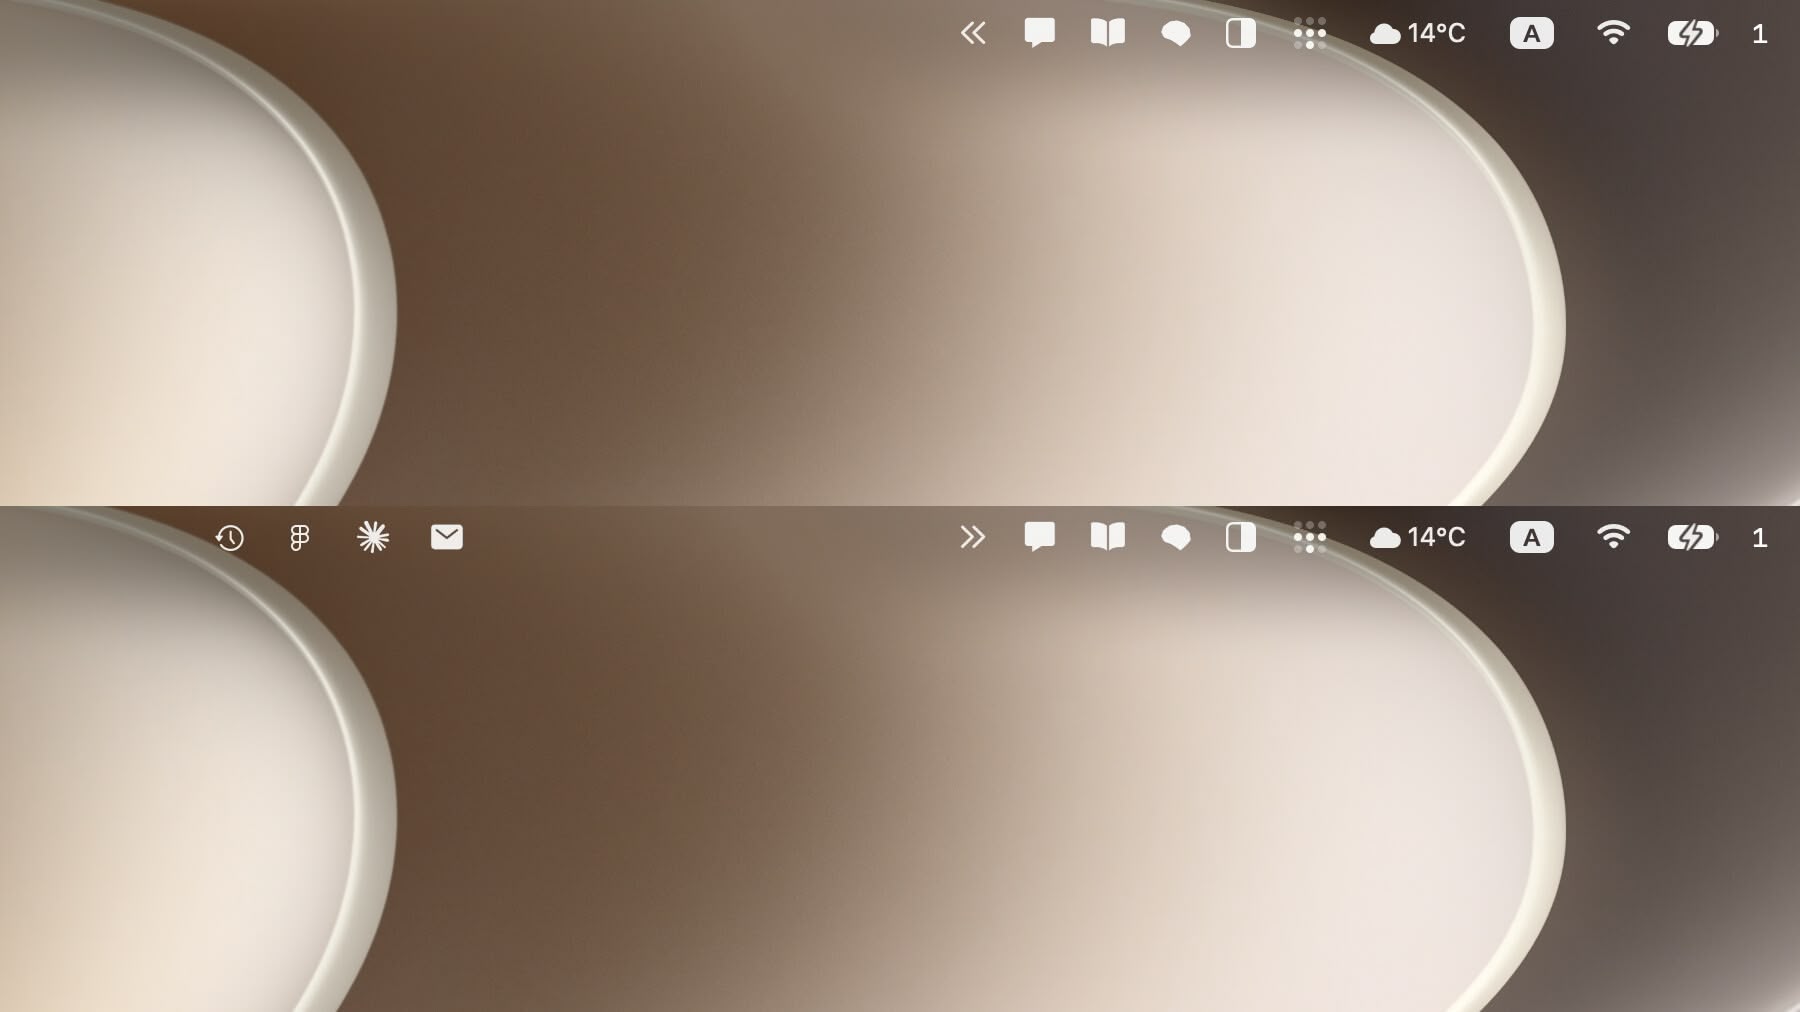
macOS Tahoe introduces a completely redesigned Menu Bar section in System Settings that gives you unprecedented control:
- Open System Settings from the Apple menu or Dock
- Click “Menu Bar” in the sidebar (new in macOS Tahoe)
- System Controls: Toggle system icons like Wi-Fi, Bluetooth, Battery, Focus, Screen Mirroring, etc.
- “Allow in the Menu Bar” section: Control third-party app permissions with individual toggles for each installed app
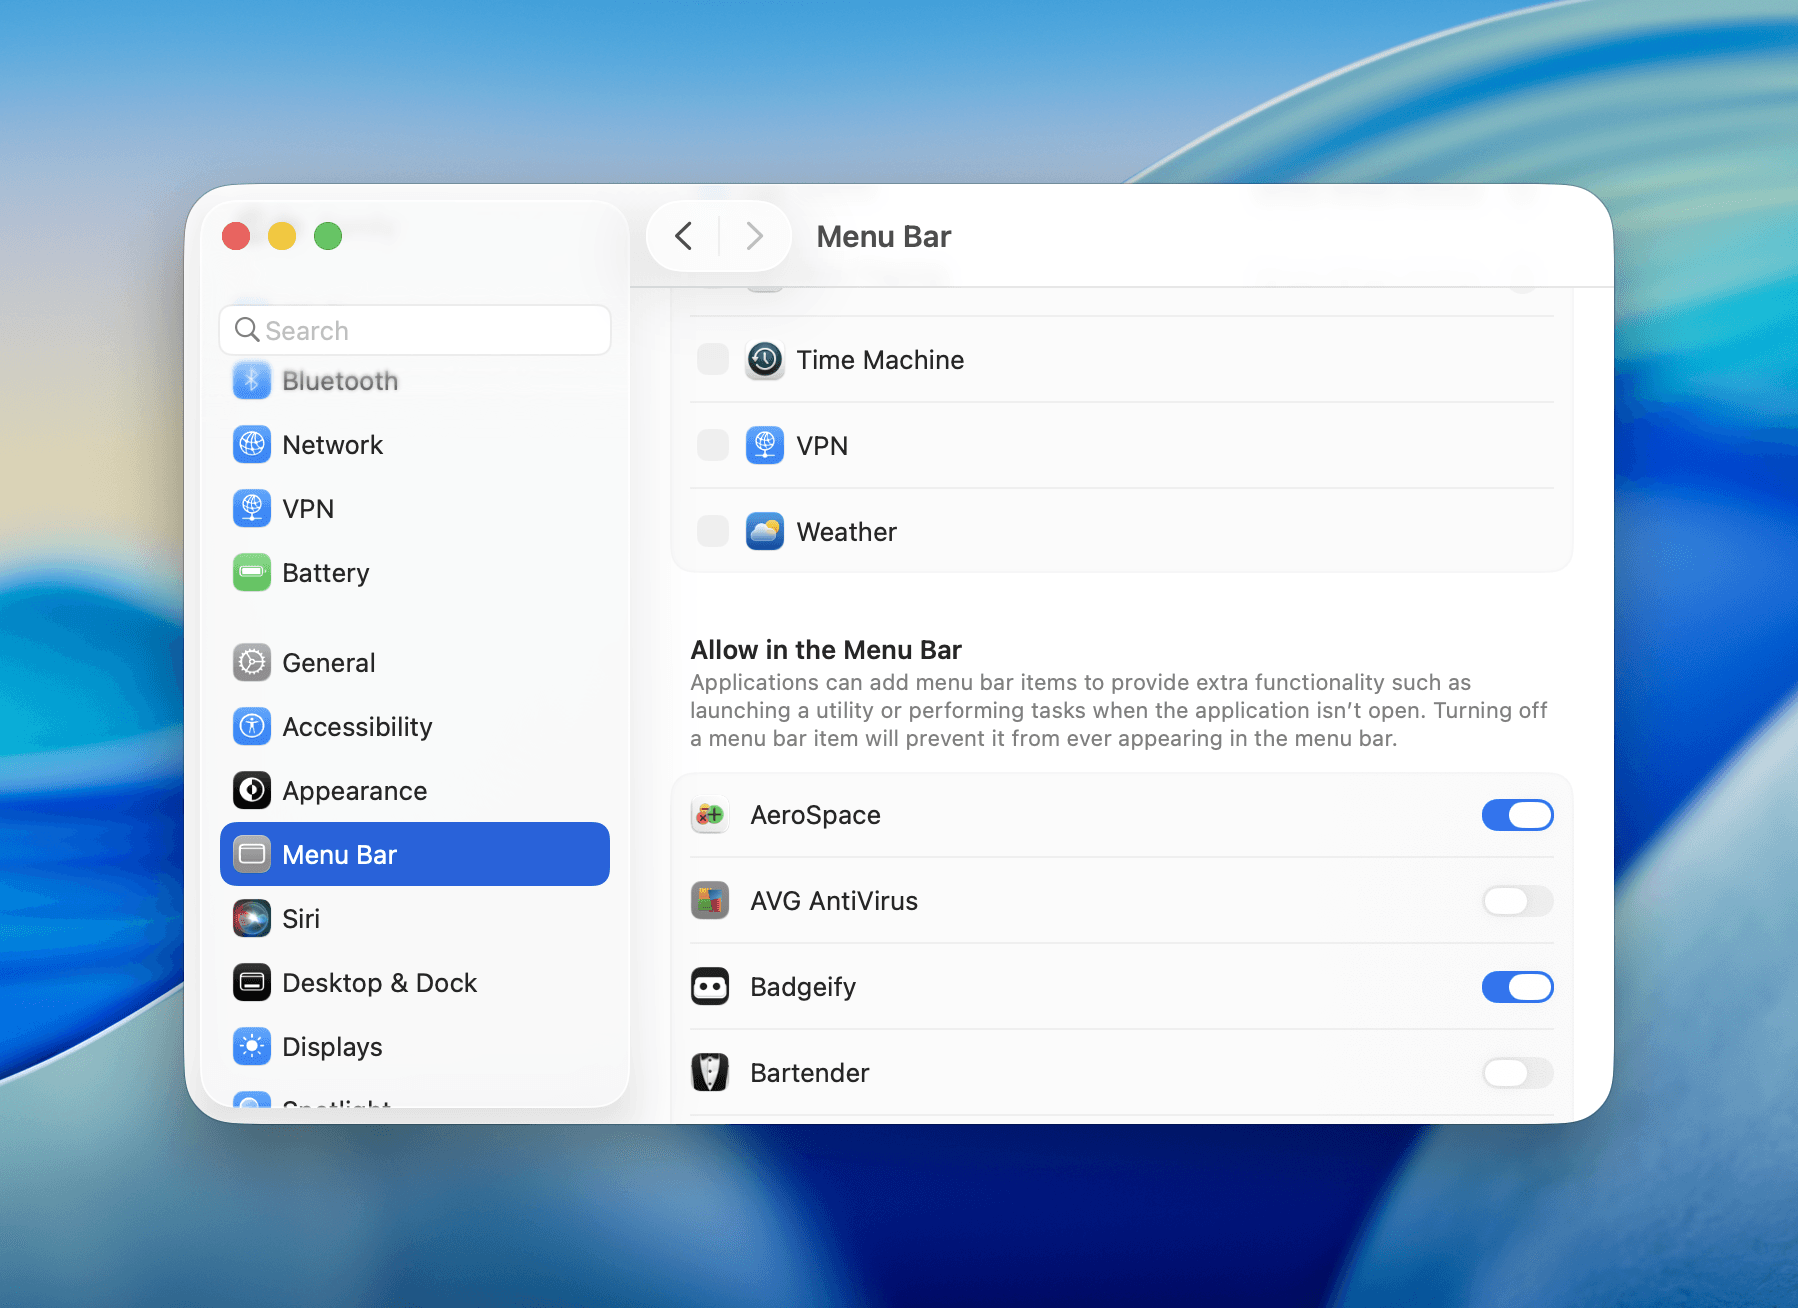
This revolutionary feature in macOS Tahoe finally solves the menu bar space problem that has plagued Mac users for years. You can now selectively enable or disable menu bar icons for any third-party application, potentially eliminating the need for menu bar manager apps like Bartender for many users.
How to Add Icons to the Menu Bar
Built-in macOS Methods
System Icons
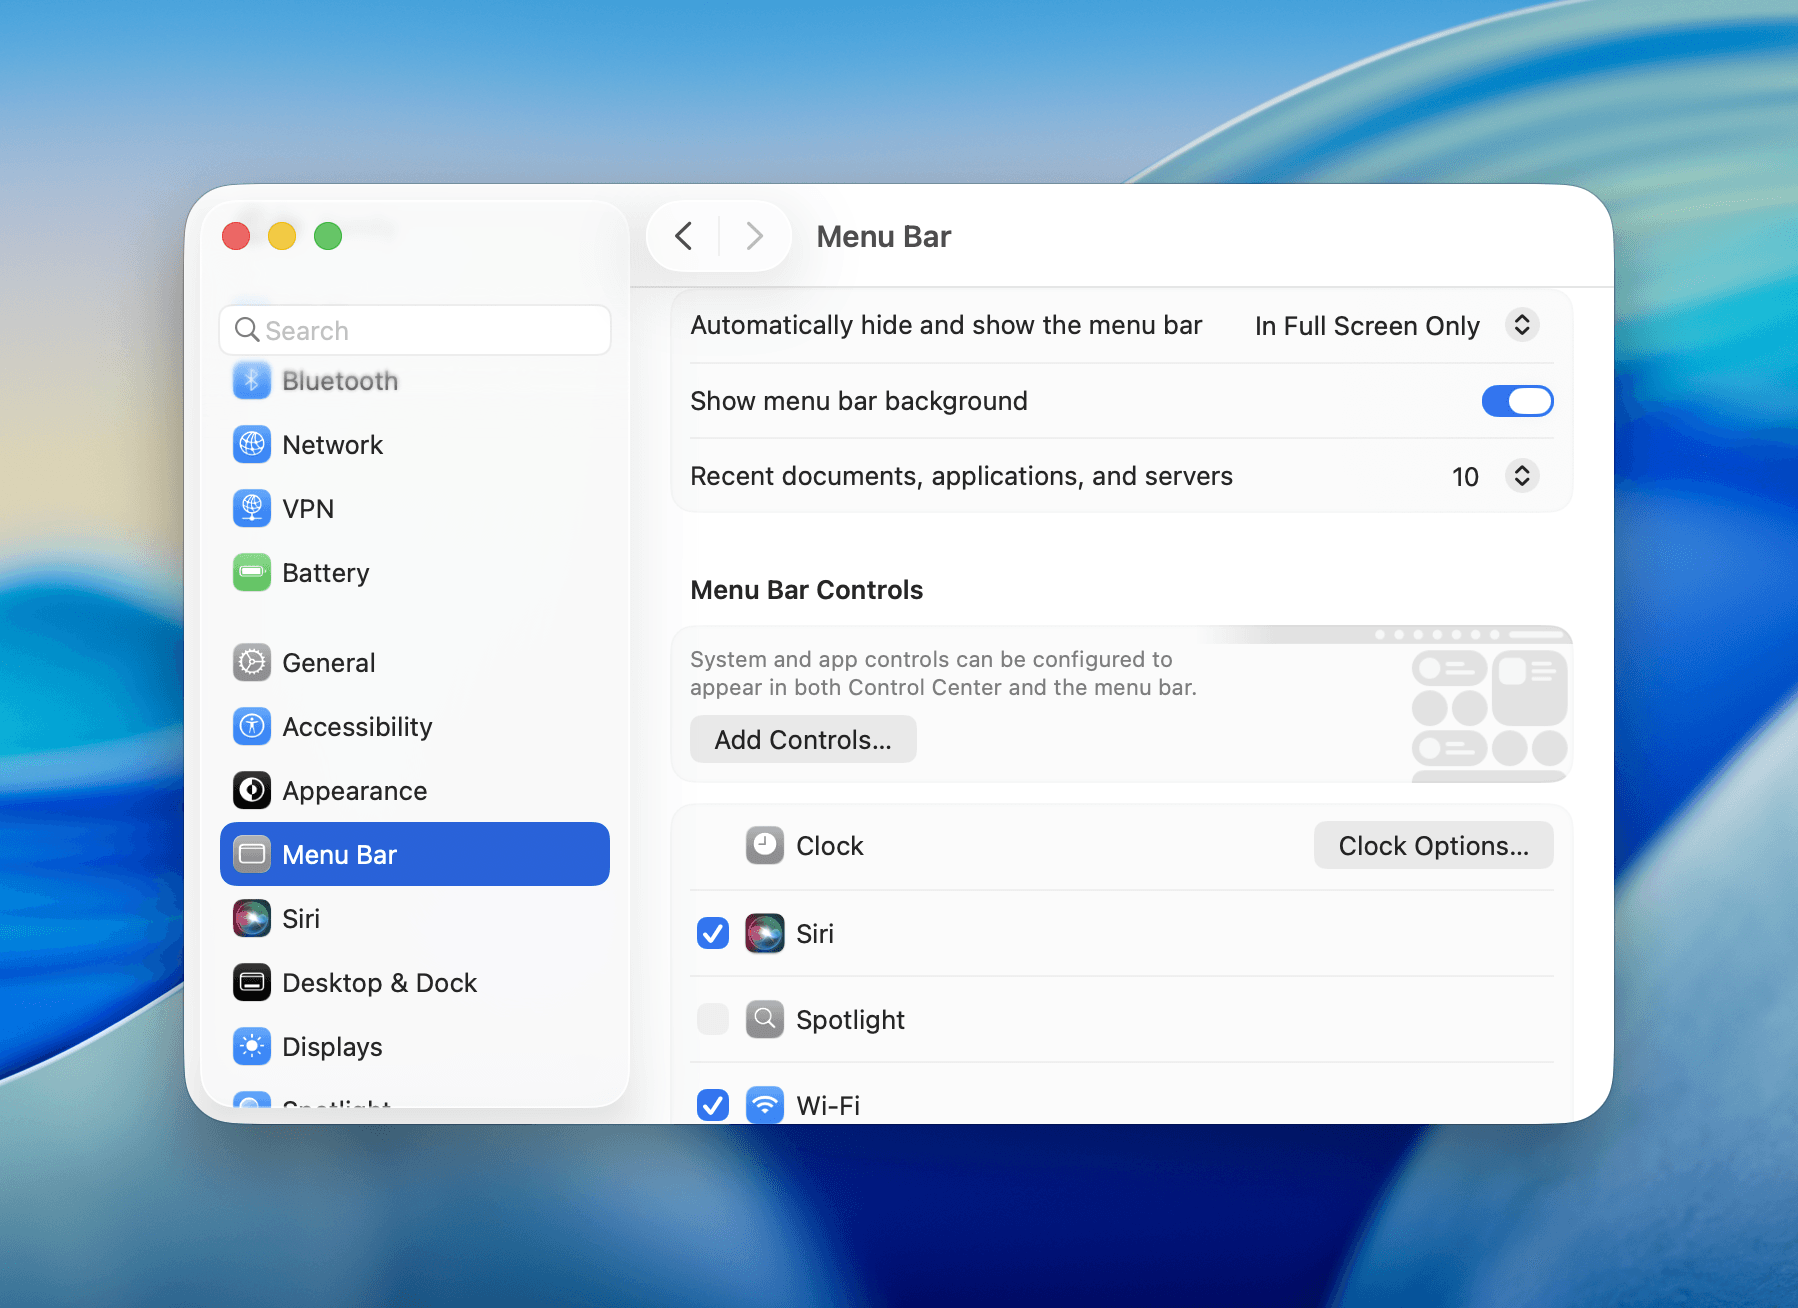
To add system icons to your menu bar:
- Open System Settings > Menu Bar
- In the main area, toggle on system controls like Clock, Siri, Spotlight, Wi-Fi, Bluetooth, Battery, Focus, Screen Mirroring, Display, Sound, etc.
- Configure additional options using buttons like “Clock Options…” or “Battery Options…”
- Arrange icons by Command + dragging them in the actual menu bar
Third-Party Apps
With macOS Tahoe’s new “Allow in the Menu Bar” feature:
- Open System Settings > Menu Bar
- Scroll down to “Allow in the Menu Bar” section
- Toggle on any third-party apps you want to appear in the menu bar
However, there’s an important limitation: this feature only controls apps that already have menu bar functionality built in. You can only show or hide existing menu bar icons—you cannot add menu bar icons for apps that don’t natively support them. This is where third-party solutions become essential.
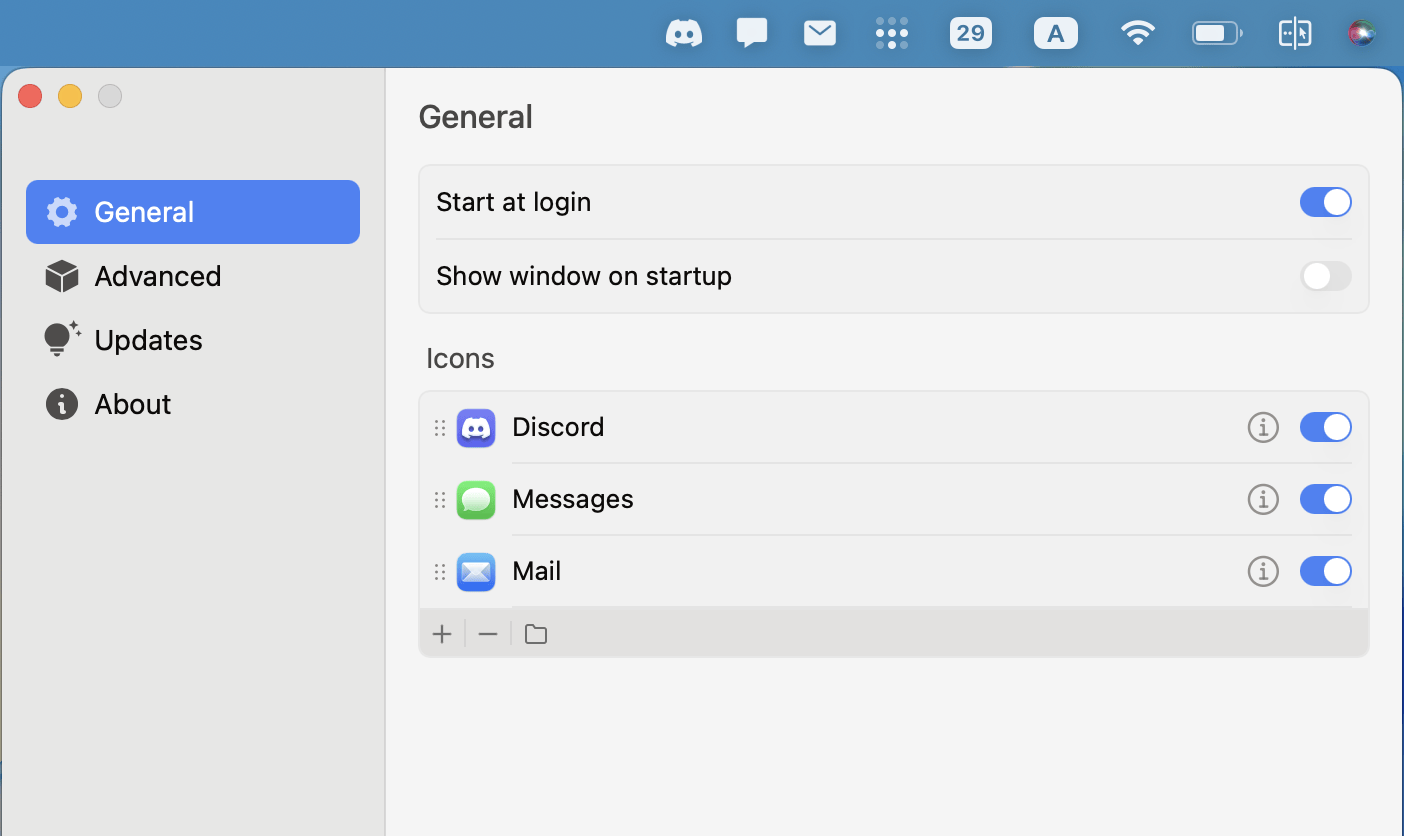
Enhanced Customization with Badgeify
While macOS provides basic menu bar customization, Badgeify takes your menu bar to the next level by allowing you to add any application to your menu bar with custom icons and notification badges.
Why Choose Badgeify?
- Add any app: Unlike built-in methods, Badgeify can add menu bar icons for apps that don’t natively support it
- Custom icons: Choose from various icon styles or use your own custom images
- Notification badges: Display unread counts and alerts directly in the menu bar
- Adaptive design: Icons automatically adapt to light and dark themes
- Native feel: Seamlessly integrates with macOS design language
How to Add Apps with Badgeify
- Download and install Badgeify from badgeify.app
- Launch the application after installation
- Click the ”+” button to add a new app to your menu bar
- Select your app from the list of installed applications
- Customize the icon style:
- Use the original app icon
- Choose from Badgeify’s curated icon recommendations
- Upload your own custom icon image
- Configure notifications to show badge counts for supported apps
- Enjoy quick access to your favorite apps directly from the menu bar
With Badgeify, you can add icons for apps like:
- Web browsers for specific sites
- Communication tools (Discord, Slack, Teams)
- Productivity apps
- Media players
- Any application you use frequently
Need More Than Built-in Controls?
If you still run out of space or want advanced layouts, use a menu bar manager:
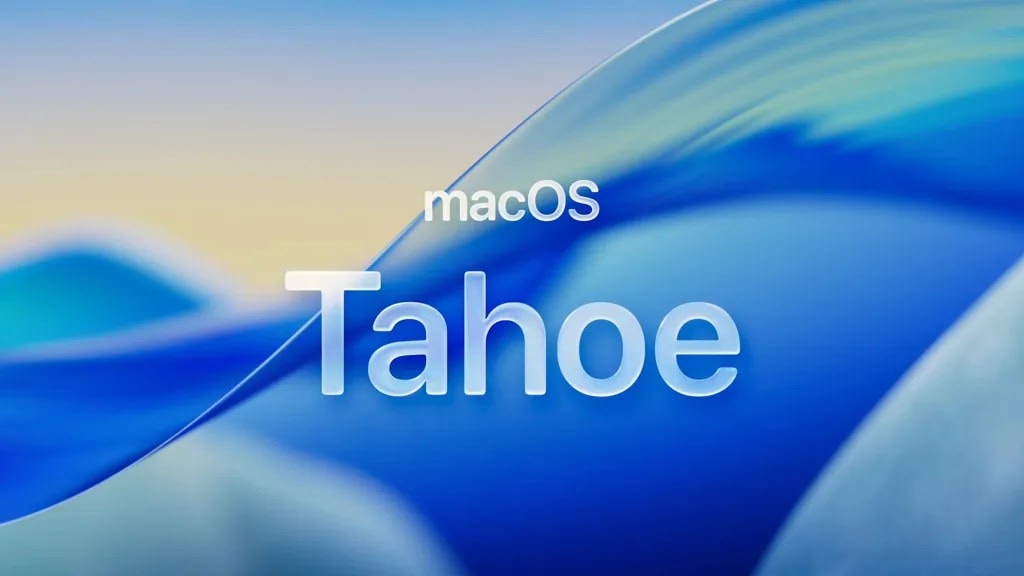
What’s New in macOS Tahoe
Beyond the improved menu bar controls, macOS Tahoe introduces a transparent “Liquid Glass” design that blends the menu bar seamlessly with your wallpaper. If you prefer the traditional look, you can restore the background in System Settings > Menu Bar > “Show menu bar background.”
The update also brings Live Activities from your iPhone directly to the Mac’s menu bar, and replaces the large volume/brightness overlays with smaller, less intrusive notifications.
Conclusion
macOS Tahoe’s enhanced menu bar customization options make it easier than ever to create a personalized, efficient workspace. The new system-level controls finally give users the granular control they’ve been requesting for years.
Whether you’re decluttering an overcrowded menu bar with the new built-in controls or adding quick access to your favorite tools with custom styling through Badgeify, these methods will help you create the perfect menu bar setup for your workflow.
Ready to Transform Your Mac Menu Bar?
Perfect companion for Bartender & Ice users. Ideal for productivity enthusiasts who prefer a cleaner desktop.